GE Deep Fill Washers offer substantial capacity, integrating with Google Nest for remote control and voice commands.
These washers, like the Ge Profile, are supported by detailed manuals, aiding users in installation and operation, even after 15+ years of development.
The GE matrix, a multi-factor portfolio assessment, reflects GE’s strategic management, while the C language aids in understanding programming principles for these advanced appliances.
What is a GE Deep Fill Washer?
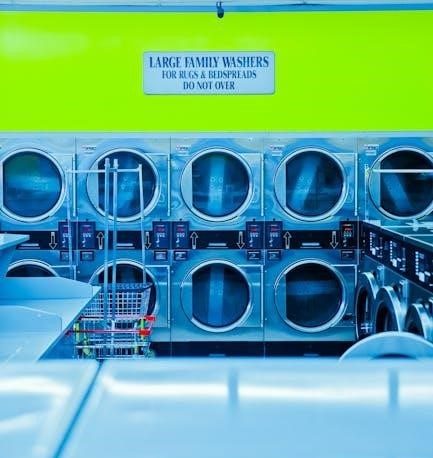
GE Deep Fill Washers represent a line of laundry appliances designed to offer a larger wash capacity compared to traditional top-load washers. This increased capacity allows for washing bulky items like comforters and bedding with greater ease, reducing the need for multiple loads. The “Deep Fill” designation specifically refers to the ability to add more water to the wash cycle, ensuring thorough saturation of clothes for a more effective clean.
These washers, often integrated with smart home ecosystems like Google Nest, provide remote control functionality via the Google Home app and voice commands. Accessing a Ge Profile Washer Manual is crucial for understanding the specific features of your model. Even older GE models, some operating for over 15 years, continue to be supported with documentation, highlighting the brand’s commitment to longevity and user assistance. Understanding the underlying principles, much like learning the C language for programming, allows for a deeper appreciation of the appliance’s capabilities.

Key Features and Benefits
GE Deep Fill Washers boast several key features enhancing the laundry experience. The primary benefit is the increased wash capacity, accommodating larger loads and bulky items efficiently. Integration with Google Nest allows for convenient remote control via voice commands and the Google Home app, offering flexibility and ease of use.
A detailed Ge Profile Washer Manual unlocks the full potential of these features, guiding users through cycle selection and customization. The GE matrix approach to business strategy translates to thoughtfully designed appliances. Like mastering the C language for programming, understanding the washer’s controls provides greater control over the cleaning process. Furthermore, the longevity of GE products, with some models operating for over 15 years, demonstrates durability and reliability, supported by readily available documentation.
Model Variations and Series
GE Deep Fill Washers are available in diverse models and series, catering to varied needs and budgets. The Ge Profile series represents a premium offering, often integrating advanced features and smart home connectivity via Google Nest. Understanding the specific features of each model is crucial, and the accompanying GE Deep Fill Washer Manual provides detailed specifications.
Like the strategic GE matrix used for business assessment, each washer series is designed with a specific consumer profile in mind. The development of systems like the 1.5T engine by Ge and Volvo demonstrates a commitment to innovation across platforms. Even older GE games demonstrate longevity, mirroring the durability expected from their appliances. Referencing the manual ensures optimal performance, similar to mastering the principles of the C language for effective programming.

Safety Precautions
GE prioritizes safety; adhere to the manual’s guidelines regarding electrical connections and child supervision, mirroring GE’s commitment to fairness and established processes.
General Safety Guidelines
Prioritize safety when operating your GE Deep Fill Washer. Always consult the manual for comprehensive instructions and heed all warnings. Disconnect the power supply before any maintenance or cleaning, ensuring a safe environment.
Never allow children to play with or around the washer, as it presents potential hazards. Supervision is crucial. Avoid contact with water during operation to prevent electrical shock, aligning with GE’s focus on lawful, safe procedures.
Do not attempt to repair the washer yourself; contact qualified service personnel for assistance. Misuse or modification can void the warranty and create dangerous situations. Remember, GE emphasizes fairness and established protocols, even if they seem complex. Proper usage, guided by the manual, ensures longevity and safe operation.
Electrical Safety
Electrical safety is paramount when using your GE Deep Fill Washer. Always ensure the washer is properly grounded, as detailed in the manual. Never operate the appliance with a damaged power cord or plug; replace them immediately. Avoid using extension cords, as they can overheat and pose a fire risk.
Do not expose the electrical components to water or moisture. If the washer experiences a power surge, disconnect it and have it inspected by a qualified technician. GE prioritizes lawful operation, meaning adherence to electrical codes is vital.
The manual outlines specific electrical requirements; ensure your outlet meets these specifications. Remember, even seemingly minor electrical issues can be dangerous. Prioritize safety and consult a professional for any concerns, mirroring GE’s commitment to fair and secure practices.
Child Safety and Supervision
Child safety is a critical consideration when operating your GE Deep Fill Washer. The manual stresses the importance of constant supervision around the appliance, especially with young children present. Never allow children to play with the washer’s controls or climb inside the drum – it poses a serious entrapment hazard.
Keep detergent pods and liquid detergents out of children’s reach, as they can be harmful if ingested. Always close and lock the washer door when not in use to prevent accidental access. GE’s commitment to fairness extends to ensuring a safe environment for all users.
Educate older children about the dangers associated with the washer. Regularly inspect the area around the appliance for any potential hazards. Prioritize a secure environment, referencing the manual for specific safety guidelines.
Washer Components and Controls
GE Deep Fill Washers feature exterior parts, an interior drum with an agitator, and a control panel with buttons and a display for operation.
Exterior Parts Identification
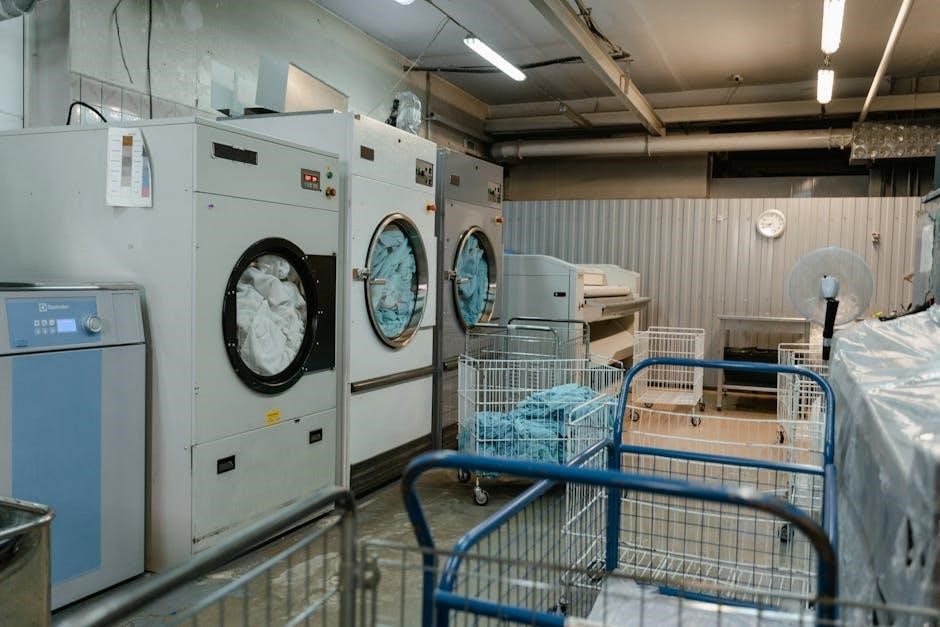
Identifying the exterior components of your GE Deep Fill Washer is crucial for proper operation and maintenance. The top panel provides access to detergent and additive dispensers, while the back panel houses the water supply connections and power cord. Carefully inspect these areas during unpacking, ensuring no damage occurred during shipping.
The washer’s cabinet is typically constructed from durable materials designed to withstand regular use. Locate the control panel, which features buttons and a display for selecting wash cycles and adjusting settings. Familiarize yourself with the door latch mechanism, ensuring it securely locks during operation.
Additionally, note the location of any leveling feet, essential for stabilizing the washer and preventing excessive vibration. Understanding these exterior features, as detailed in your GE manual, will contribute to a seamless laundry experience and prolong the appliance’s lifespan. Remember safety precautions when inspecting electrical components.
Interior Drum and Agitator
The interior of your GE Deep Fill Washer features a stainless steel drum designed for durability and efficient cleaning. This drum rotates during wash cycles, agitating clothes to remove dirt and stains. Central to the washing process is the agitator, a finned component that creates water movement and friction.
Different GE models may have varying agitator designs; consult your manual for specifics. Inspect the drum’s interior for any foreign objects before each load. Pay attention to the presence of any perforations or patterns within the drum, as these contribute to water circulation.
Understanding the interaction between the drum and agitator, as outlined in the GE manual, is key to optimizing wash performance. Proper loading techniques, avoiding overloading, will ensure effective cleaning and prevent damage to these vital components. Regular cleaning of the drum is also recommended.
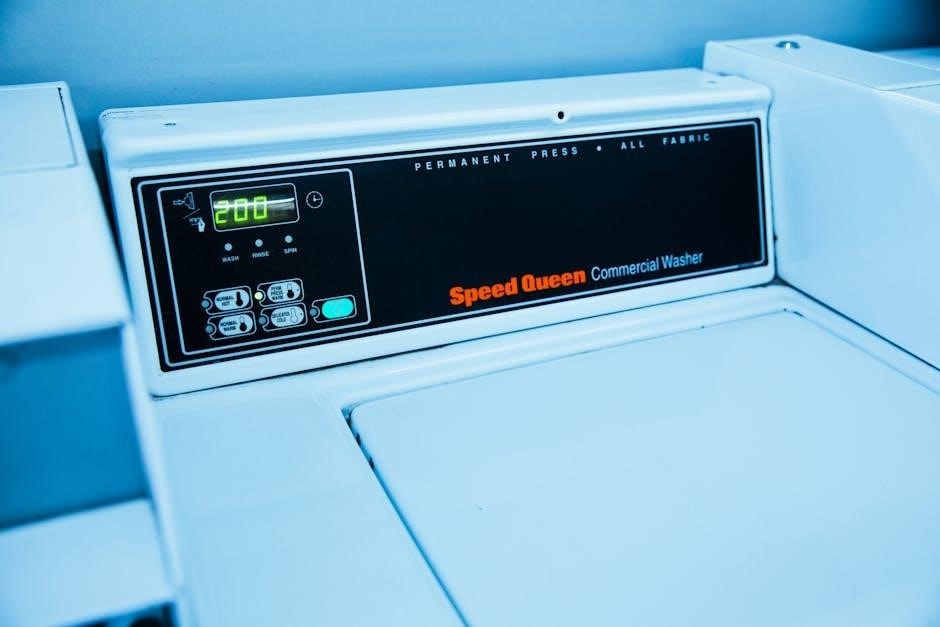
Control Panel Overview (Buttons & Display)
The control panel on your GE Deep Fill Washer is your command center for selecting wash cycles and customizing settings. A digital display clearly indicates the selected cycle, remaining time, and any active options. Buttons are typically labeled with intuitive icons representing different wash cycles – such as Normal, Delicates, Heavy Duty, and Quick Wash.
Additional buttons allow you to adjust temperature, spin speed, and soil level. Some models integrate with Google Nest, enabling remote control via the Google Home app. The manual provides a detailed explanation of each button’s function and display indicator.
Familiarizing yourself with the control panel, as detailed in the GE manual, is crucial for efficient operation. Understanding error codes displayed on the screen will also aid in troubleshooting potential issues. Proper use of these controls ensures optimal cleaning performance.

Getting Started: Installation
Installation requires unpacking, inspection, and leveling the washer, followed by connecting the water supply, as detailed in the GE manual for optimal performance.
Unpacking and Inspection
Carefully unpack your new GE Deep Fill Washer, retaining all packaging materials until you’ve confirmed complete functionality and are satisfied with the condition of the appliance. A thorough inspection is crucial before installation. Begin by checking for any visible damage incurred during shipping – dents, scratches, or broken parts.
Compare the contents of the box against the parts list included in your GE manual. This ensures all components are present, including the drain hose, inlet hoses, and any included accessories.
Inspect the interior drum for any loose items or debris left from the manufacturing process. If damage is detected, immediately contact the retailer or GE customer support; do not attempt to operate a damaged machine. Document any issues with photographs for claim purposes. Proper unpacking and inspection prevent future complications.
Leveling the Washer
Proper leveling is essential for optimal GE Deep Fill Washer performance, minimizing vibration and noise during operation. Begin by placing a level on top of the washer, checking both front-to-back and side-to-side. Adjust the leveling feet, located at the bottom corners of the appliance, by rotating them clockwise or counterclockwise.
Continue adjusting until the bubble in the level is centered, indicating a perfectly level surface. Ensure all four feet are firmly in contact with the floor. If your floor is uneven, you may need to use shims under the feet for stability.
A stable, level washer prevents excessive movement, protecting your floor and ensuring efficient washing and spinning cycles. Refer to your GE manual’s diagrams for precise foot adjustment instructions.
Water Supply Connection
Connecting the water supply to your GE Deep Fill Washer requires careful attention to detail. Locate the hot and cold water inlets on the back of the washer, typically marked with blue and red indicators respectively. Attach the supplied water hoses, ensuring a snug, hand-tight fit – avoid using pliers, as this can damage the connections.
Before fully tightening, slowly turn on the water supply to check for leaks at both the hose connections and the faucet. Tighten further if necessary, but do not overtighten.
Consult your GE manual for specific hose length recommendations and potential adapter requirements. Proper connection prevents water damage and ensures optimal washer functionality, similar to the precision found in GE’s strategic management practices.

Operating Instructions
GE Deep Fill Washers utilize intuitive controls; load clothes, add detergent, select a cycle—benefiting from Google Nest integration for remote operation and precise settings.
Loading the Washer
Proper loading is crucial for optimal cleaning performance with your GE Deep Fill Washer. Distribute items loosely within the drum, avoiding tightly packed bundles which can hinder water and detergent circulation.
Separate items by fabric type and color – whites, lights, and darks should be washed independently to prevent dye transfer. For heavily soiled items, pre-treat stains before loading.
Do not overload the washer; exceeding the maximum load capacity (refer to your model’s manual) will reduce cleaning effectiveness and potentially damage the machine.
For optimal results, leave several inches of space between the top of the load and the agitator or drum. Bulky items like blankets or comforters should be loaded individually to ensure thorough washing and rinsing. Remember, a balanced load minimizes vibration during operation.
Adding Detergent and Additives
Refer to your GE Deep Fill Washer manual for precise detergent recommendations based on load size and soil level. Use only High Efficiency (HE) detergents, as standard detergents create excessive suds that can impact performance and potentially damage the machine.
Pour the detergent into the designated dispenser drawer – typically marked for detergent, fabric softener, and bleach. Avoid overfilling; follow the maximum fill lines indicated on the dispenser.
Liquid bleach should be diluted with water before adding to the bleach dispenser to prevent discoloration of fabrics. Fabric softener dispenses automatically during the rinse cycle, enhancing softness and reducing static cling.
Powdered detergents should be added directly to the drum if your model doesn’t have a dispenser, ensuring they dissolve completely before clothes are added. Always consult the detergent manufacturer’s instructions for optimal usage.
Selecting Wash Cycles
Your GE Deep Fill Washer offers a variety of wash cycles to accommodate different fabric types and cleaning needs. Consult your GE washer manual for a complete list and detailed descriptions of each cycle.
Common cycles include Normal, Delicates, Heavy Duty, Quick Wash, and Bulky Items. The Normal cycle is suitable for everyday laundry, while Delicates is ideal for lingerie and fragile fabrics. Heavy Duty tackles heavily soiled items like work clothes and towels.
The Quick Wash cycle provides a faster cleaning option for lightly soiled loads. Utilize the Bulky Items cycle for comforters and blankets. Temperature settings (Hot, Warm, Cold) and spin speeds (High, Medium, Low) can be adjusted for customized cleaning.
Remember to select the appropriate cycle and settings based on the garment care labels to prevent damage and ensure optimal cleaning results.

Troubleshooting Common Issues
GE washer problems, like failing to start or drain, are addressed in the manual; error codes provide diagnostic clues for efficient repair and operation.
Washer Won’t Start
If your GE Deep Fill Washer fails to start, several potential issues could be the cause. First, verify the power cord is securely plugged into a functioning electrical outlet. Consult the GE manual for specific electrical safety guidelines and voltage requirements.
Next, check the lid switch; the washer won’t operate if the lid isn’t properly closed and the switch engaged. A faulty lid switch is a common problem. Also, ensure the water supply valves are fully open, as some models have a safety feature preventing operation without adequate water pressure.
Review the control panel; a paused cycle or a selected option requiring specific conditions (like a hot water fill) might prevent immediate start-up. The GE manual details each cycle’s requirements. Finally, if the issue persists, consult the error code section of the manual, as a displayed code can pinpoint the exact problem, potentially indicating a motor or control board malfunction.
Washer Not Draining
If your GE Deep Fill Washer isn’t draining, begin by checking the drain hose for kinks or obstructions. Ensure it’s not bent or crushed, and that it’s properly inserted into the drainpipe. Refer to your GE manual for the correct hose installation height to ensure proper gravity flow.
Next, inspect the drain pump filter – often located at the front of the washer – for lint, debris, or small objects. A clogged filter is a frequent cause of drainage issues. The manual provides instructions on accessing and cleaning this filter safely.
If the filter is clear, the drain pump itself might be faulty. Error codes displayed on the control panel, as detailed in the GE manual, can help diagnose pump failures. In some cases, a blocked drainpipe in your home’s plumbing system could be the culprit, requiring a plumber’s assistance.
Error Codes and Their Meanings
GE Deep Fill Washers utilize error codes to signal malfunctions, detailed within your washer’s manual. These codes provide valuable diagnostic information, helping pinpoint the issue without requiring immediate service. For example, a code referencing the drain pump suggests a blockage or pump failure – check the drain hose and filter first, as outlined in the manual.
Other codes might indicate issues with water inlet valves, temperature sensors, or the control board itself. The manual offers specific troubleshooting steps for each code, ranging from simple resets to more complex component checks.
Remember to always consult your GE manual for the precise meaning of each error code displayed on your washer’s control panel. Ignoring error codes can lead to further damage and potentially void your warranty.

Maintenance and Cleaning
GE manuals emphasize regular cleaning of the drum, detergent dispenser, and exterior to maintain performance. Consistent upkeep, like with the CMA platform, ensures longevity.
Following these guidelines prevents buildup and extends the life of your Deep Fill Washer.
Cleaning the Washer Drum
Regular drum cleaning is crucial for maintaining the performance and hygiene of your GE Deep Fill Washer. Over time, detergent residue, fabric softener, and mineral deposits can accumulate, leading to odors and potentially affecting wash results. The GE manual recommends performing a cleaning cycle at least once a month, or more frequently with heavy use.
To initiate a drum clean, ensure the washer is empty. Many GE models feature a dedicated “Drum Clean” cycle – consult your specific model’s manual for instructions. If a dedicated cycle isn’t available, select the hottest water temperature and the largest load size, then add a washer cleaner specifically designed for front-load or top-load machines (depending on your model). Run a complete wash cycle.

For a manual clean, create a solution of warm water and white vinegar (approximately 1 cup of vinegar per load size) and pour it into the detergent dispenser. Run a complete wash cycle on the hottest setting. After the cycle completes, leave the washer door or lid open to allow the drum to air dry completely, preventing mildew growth. This practice, similar to maintaining the CMA platform, ensures optimal function.
Cleaning the Detergent Dispenser
The detergent dispenser in your GE Deep Fill Washer requires regular cleaning to prevent clogs and ensure proper detergent distribution. Residue buildup, much like issues addressed through GE’s multi-factor matrix, can hinder performance and lead to incomplete cleaning. The GE manual advises cleaning the dispenser monthly, or more often if you notice residue.
Most GE washers have a removable detergent dispenser drawer. Consult your model’s manual for specific removal instructions. Once removed, rinse the drawer and its individual compartments (for detergent, fabric softener, and bleach) under warm running water. Use a soft brush or cloth to scrub away any stubborn residue.
For particularly tough buildup, soak the dispenser drawer in a solution of warm water and white vinegar for 30 minutes before scrubbing. Ensure all traces of vinegar are rinsed away before reinserting the drawer. Maintaining a clean dispenser, akin to the precision of C language programming, contributes to the longevity and efficiency of your appliance.
Cleaning the Exterior
Maintaining the exterior of your GE Deep Fill Washer not only enhances its appearance but also protects the finish. Like the long-standing operation of GE appliances – over 15 years in some cases – regular care extends its lifespan. Always disconnect the power before cleaning, mirroring electrical safety guidelines.
Use a soft, damp cloth with mild detergent to wipe down the washer’s cabinet, control panel, and lid. Avoid abrasive cleaners, as they can scratch the surface. For stubborn stains, a paste of baking soda and water can be gently applied, followed by thorough rinsing.
Pay attention to the area around the control panel, where detergent or fabric softener may have splashed. Ensure the cloth is wrung out well to prevent water from seeping into the controls. A clean exterior, much like a well-structured C program, reflects attention to detail and contributes to overall satisfaction.