
Honeywell VisionPro 8000 Installation Guide: A Comprehensive Plan
This guide details the installation of the Honeywell VisionPro 8000 thermostat, covering safety, wiring, setup, and troubleshooting.
It ensures proper functionality and optimal performance for your heating and cooling systems.

The Honeywell VisionPro 8000 series represents a significant advancement in home comfort control, offering a touchscreen programmable thermostat designed for ease of use and comprehensive system management. This thermostat, detailed in operating manuals like 69-1894EFS03, is compatible with various heating and cooling systems, including conventional and heat pump setups.
Installation requires careful attention to safety precautions, particularly regarding electrical shock and battery handling (containing potential perchlorate material). The VisionPro 8000 boasts Wi-Fi connectivity, enabling remote control and monitoring. Proper installation, as outlined in manuals available on ManualsLib, is crucial for maximizing its features and ensuring long-term reliability.
Safety Precautions
Prior to installation, disconnecting power is paramount to prevent electrical shock or equipment damage. The VisionPro 8000 installation necessitates a trained and experienced technician due to potential hazards. Exercise extreme caution; never utilize sharp objects like pencils to interact with the touchscreen, as this can cause damage.
Furthermore, the thermostat contains a lithium battery potentially including perchlorate material, requiring special handling. Always read and adhere to all instructions carefully. Failure to do so could result in product damage or personal injury. Refer to the installation manual (69-1706) for detailed safety guidelines.
Electrical Shock Hazards
Working with electrical systems presents significant shock hazards. Always disconnect power at the breaker before commencing any installation procedures. Failure to do so could result in severe injury or even death. Ensure the power remains off throughout the entire wiring process.
Inspect all wiring for damage before connecting it to the VisionPro 8000. Never touch bare wires or terminals while the power is on. If you are uncomfortable working with electrical wiring, consult a qualified electrician; The installation manual (69-1706) emphasizes this critical safety precaution.
Battery Handling (Lithium/Perchlorate)
This thermostat contains a lithium battery, which may include perchlorate material. Handle with extreme care and follow all safety guidelines. Do not attempt to recharge, disassemble, or incinerate the battery. Improper handling could pose a risk of explosion or chemical burn.
Dispose of the battery properly, adhering to local regulations for lithium battery and perchlorate waste. Avoid contact with skin or eyes. The operating manual (69-1894EFS03) specifically warns against using sharp objects to press touchscreen keys, potentially damaging the thermostat and battery compartment.
Package Contents Verification
Before beginning installation, carefully verify all components are present. The package should include the VisionPro 8000 touchscreen programmable thermostat itself, a mounting base plate, screws and anchors for secure installation, and a detailed installation manual (e.g., 69-1706).
Confirm the presence of wire labels for identifying existing wiring. Inspect all items for any shipping damage. If any components are missing or damaged, immediately contact Honeywell Customer Care. Proper verification ensures a smooth installation process and avoids delays. Refer to the manual for a complete parts list.
Tools Required for Installation
Successful installation necessitates specific tools. You will need a Phillips head screwdriver for mounting the base plate and connecting wires. A flathead screwdriver may be useful for certain terminal connections. Wire strippers are essential for preparing wires for secure attachment.
A level ensures the thermostat is mounted straight for accurate readings. A voltage tester is crucial for verifying power is disconnected before working with wiring – always disconnect power! Pliers can assist with wire manipulation. Finally, have a pen or marker available for labeling wires before disconnection.
System Compatibility Check
Before installation, verify system compatibility. The VisionPro 8000 supports most 24V heating and cooling systems. Confirm compatibility with your specific heating system – conventional, forced air, or radiant. Similarly, check compatibility with cooling systems, including central air conditioning.
Crucially, the thermostat also works with heat pumps, but proper configuration is vital. If using an Equipment Interface Module, note that relay outputs and inputs may not function. Ensure your system meets the voltage requirements for optimal performance and avoid potential damage.
Heating System Compatibility
The VisionPro 8000 is generally compatible with most 24V heating systems, including gas, oil, and electric furnaces. However, confirm your system’s voltage and wiring configuration before proceeding. Conventional heating systems are typically straightforward, but forced air and radiant systems may require specific wiring adjustments.
Carefully review your existing wiring to ensure it aligns with the thermostat’s terminal designations. Incorrect wiring can lead to system malfunction or damage. A trained, experienced technician is recommended for complex installations. Always disconnect power before working with any wiring!
Cooling System Compatibility
The Honeywell VisionPro 8000 supports most standard 24V cooling systems, including central air conditioners and heat pumps in cooling mode. Verify your cooling system’s voltage and wiring before installation. Compatibility issues can arise with systems utilizing proprietary communication protocols or high-voltage components.
Ensure proper wiring to the ‘Y’ terminal for compressor control and ‘G’ for the fan. Incorrect connections can prevent the cooling system from operating correctly or cause damage. If unsure, consult a qualified HVAC technician for assistance. Disconnect power before any wiring modifications!
Heat Pump Compatibility
The VisionPro 8000 is compatible with most 24V heat pump systems, supporting both standard and reverse cycle configurations. Proper configuration is crucial for correct operation in both heating and cooling modes. Verify your heat pump’s wiring scheme, specifically identifying the O/B terminal for reversing valve control.
Incorrect wiring can lead to improper heating or cooling, or even damage to the heat pump. The thermostat requires accurate system type selection during initial setup. Consult a qualified HVAC technician if you are unsure about your heat pump’s wiring or configuration. Disconnect power before making any connections.
Disconnecting Power
Before beginning any installation steps, it is absolutely critical to disconnect power to your heating and cooling system at the breaker panel. Failure to do so presents a significant risk of electrical shock or damage to the equipment. Locate the breaker that controls the thermostat wiring and switch it to the “OFF” position.
Verify the power is off by testing the wires at the existing thermostat with a non-contact voltage tester. Double-check to ensure no voltage is present. Safety is paramount; proceed only after confirming the power is completely disconnected. This precaution protects both you and your system.
Removing the Old Thermostat
Carefully remove the cover of your existing thermostat, often by gently prying it away from the base plate. Before disconnecting any wires, it’s crucial to meticulously label each wire with its corresponding terminal designation. Use the provided wire labels or create your own detailed markings.
This labeling is essential for correct wiring of the VisionPro 8000. Once labeled, disconnect the wires one at a time, avoiding any accidental shorts. Keep a record of the wiring configuration for future reference. Remove the old base plate from the wall.
Labeling Wires Before Disconnection
Accurate wire labeling is paramount before disconnecting anything from your old thermostat. Utilize the provided wire labels, carefully affixing one to each wire as it corresponds to its terminal on the existing thermostat. If labels aren’t included, create your own using masking tape and a pen, clearly noting the terminal letter (e.g., R, W, G, Y).
Ensure the writing is legible and secure. This meticulous step prevents confusion during the VisionPro 8000 installation. Double-check each label against the wiring diagram. A detailed record of the existing wiring configuration is invaluable for a smooth transition.
Disconnecting Wires from Old Thermostat
Before proceeding, absolutely ensure power to the heating/cooling system is completely disconnected at the breaker. Using the labels applied previously, carefully disconnect each wire from the old thermostat. Avoid pulling on the wires themselves; instead, gently loosen the terminal screws or release the retaining clips.
Straighten any bent wire ends for easier insertion into the VisionPro 8000 terminals. Keep the wires separated to prevent accidental contact. Document the disconnection process with a photograph for reference if needed. Proceed with caution to avoid electrical shock or damage to the wiring.
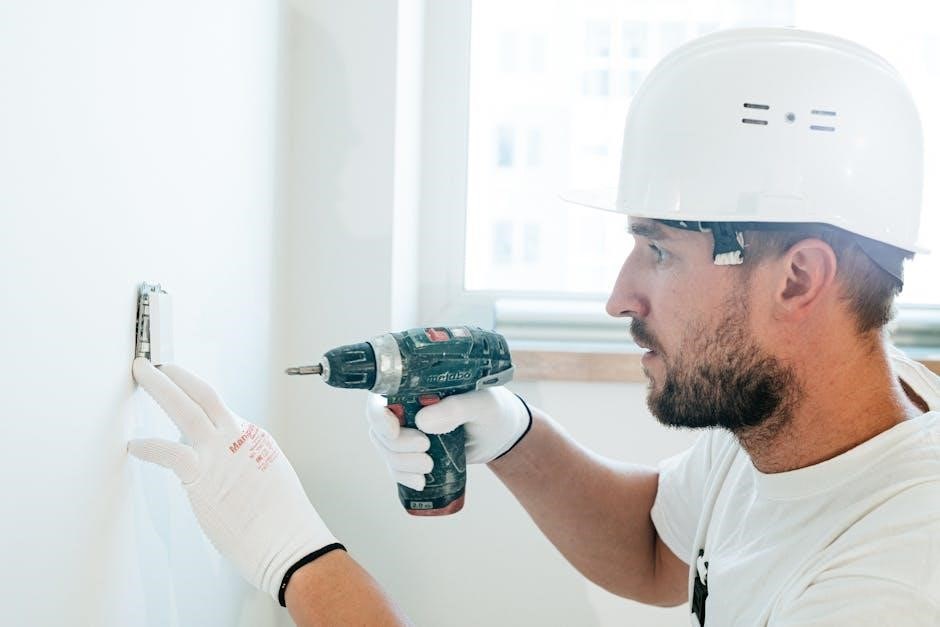
Mounting the VisionPro 8000 Base Plate
Select a suitable location on the wall, ensuring it’s level and clear of obstructions. Utilize the provided mounting screws and anchors, if necessary, for a secure attachment. Position the base plate, aligning it with the pre-drilled holes. Ensure the base plate is firmly affixed to the wall, preventing any wobbling or instability.
Double-check the levelness before fully tightening the screws. A secure base plate is crucial for proper thermostat operation and aesthetic appearance. Avoid over-tightening the screws, which could damage the wall or the base plate itself.
Wiring the VisionPro 8000
Before connecting any wires, verify power is disconnected at the breaker. Identify each wire using the labels applied during old thermostat removal. Refer to the wiring diagram included with the VisionPro 8000, carefully matching wire colors to the corresponding terminals.
Securely connect each wire to its designated terminal, ensuring a firm connection. Incorrect wiring can damage the thermostat or your HVAC system. Pay close attention to the ‘C’ wire (common wire), which is often required for proper operation. Double-check all connections before proceeding.
Identifying Terminal Connections
The VisionPro 8000 utilizes labeled terminals for specific HVAC system connections. Common terminals include ‘R’ (power), ‘C’ (common), ‘W’ (heat), ‘Y’ (cool), ‘G’ (fan), and potentially ‘O/B’ (reversing valve for heat pumps). Refer to your system’s wiring diagram and the thermostat’s manual for precise identification.
Some terminals may have dual designations, accommodating different system configurations. Carefully examine the terminal markings and consult the documentation if unsure. Incorrect connections can lead to system malfunction. Ensure you understand each terminal’s function before proceeding with wiring.
Connecting Wires to the Correct Terminals
After identifying each wire, carefully connect them to their corresponding terminals on the VisionPro 8000 base plate. Ensure each wire is securely inserted into the terminal block, avoiding loose connections. Use a small screwdriver to tighten the terminal screws, but avoid over-tightening.
Double-check all connections against your wiring diagram and the thermostat’s labeling. Incorrect wiring can damage your HVAC system. If you encounter difficulty, consult a qualified HVAC technician. Prioritize safety by disconnecting power before and during the wiring process.
Attaching the Thermostat to the Base Plate
Once all wiring is verified and secure, carefully align the VisionPro 8000 thermostat with the mounted base plate. Gently press the thermostat onto the base plate until it clicks into place, ensuring a snug and secure fit. Avoid forcing the thermostat, as this could damage the internal components or wiring connections.
Confirm the thermostat is firmly attached and doesn’t wobble. A proper connection is crucial for reliable operation. Inspect the alignment to ensure the display is level and easily readable. This step completes the physical installation process before powering on the system.
Powering On the Thermostat
After securely attaching the thermostat to the base plate, restore power to the heating and cooling system at the breaker panel. Observe the thermostat display; it should illuminate, indicating power is successfully supplied. If the display remains blank, double-check the wiring connections and the breaker status.
Allow the thermostat a few moments to initialize and begin the startup sequence. The initial startup may involve a self-test and system check. Be patient during this process. A successful power-on is a critical step before proceeding to the initial setup and configuration stages.
Initial Setup and Configuration
Upon powering on, the VisionPro 8000 will guide you through initial setup. First, accurately set the current date and time using the touchscreen interface. Correct timekeeping is essential for scheduling functions. Next, select the appropriate system type – furnace, air conditioner, or heat pump – to ensure correct operation.
The thermostat may prompt for additional information regarding your system’s configuration. Carefully follow the on-screen instructions. Proper system type selection is crucial for optimal performance and efficiency. Confirm all settings before proceeding to the Wi-Fi connection setup.
Date and Time Setting

Accurate date and time settings are fundamental for the VisionPro 8000’s scheduling capabilities. Upon initial power-up, the thermostat will prompt you to configure these settings. Utilize the touchscreen interface to navigate through the month, day, and year selections. Similarly, adjust the hour and minute to reflect the current time.
Ensure you verify the AM/PM setting to avoid errors. Correct timekeeping is vital for programmed temperature schedules to function as intended. Confirm your selections before saving, as incorrect settings will impact the thermostat’s operational efficiency. This initial step is crucial for a seamless user experience.
System Type Selection
The VisionPro 8000 requires accurate system type identification for optimal performance. During initial setup, the thermostat will ask you to define your heating and cooling configuration. Options typically include forced air, hot water, heat pump, and others. Carefully select the option that precisely matches your home’s HVAC system.
Incorrect selection can lead to inefficient operation or even damage to your equipment. If you are unsure of your system type, consult a qualified HVAC technician. The thermostat may also ask about fuel source, such as gas or oil. Confirm all selections before proceeding to ensure proper functionality.
Wi-Fi Connection Setup
To enable remote control and access advanced features, connect your VisionPro 8000 to your home’s Wi-Fi network. Navigate to the network settings within the thermostat’s menu. The thermostat will scan for available networks; select yours from the list. Enter your Wi-Fi password carefully, ensuring correct capitalization.
A successful connection will be indicated by a Wi-Fi icon on the display. If the connection fails, double-check your password and network settings. Ensure your router is functioning correctly and within range. Once connected, you can download the Honeywell Home app for remote access.
Programming the Thermostat
The VisionPro 8000 offers flexible programming options to optimize comfort and energy savings. Understand the different programming modes – Heat, Cool, Auto, and Off – to tailor settings to your needs. Setting temperature schedules allows you to define different temperatures for various times of the day and days of the week;
Utilize the touchscreen interface to easily create and modify schedules. Consider your daily routines and preferences when setting temperatures. Experiment with different settings to find the optimal balance between comfort and efficiency. Review the “Programming at a glance” section for quick reference.
Understanding Programming Modes
The VisionPro 8000 features distinct programming modes for versatile climate control. Heat mode activates the heating system to maintain the set temperature. Cool mode engages the cooling system for temperature reduction. Auto mode intelligently switches between heating and cooling to maintain a desired temperature range.
Off mode disables both heating and cooling, providing a constant temperature based on ambient conditions. Selecting the appropriate mode ensures efficient operation and comfort. Consider seasonal changes and personal preferences when choosing a mode. Experiment with Auto mode for balanced climate control.
Setting Temperature Schedules
The VisionPro 8000 allows customized temperature schedules for energy savings and comfort. Program different temperatures for various times of day and days of the week. Utilize the touchscreen interface to easily create and modify schedules. Consider your daily routines and occupancy patterns when setting temperatures.
Lower temperatures during sleep or when away from home. Raise temperatures for comfort during waking hours. Explore the “Follow Me” feature for personalized temperature control. Save your schedules for consistent climate management. Regularly review and adjust schedules for optimal efficiency.
Testing the System
After installation, thoroughly test both heating and cooling functions. Initiate a heating cycle and verify warm air is distributed. Confirm the thermostat accurately calls for heat and the system responds. Then, activate the cooling cycle and check for cold air circulation. Ensure proper airflow and temperature reduction.
Monitor the thermostat display for correct operation and error messages. Observe the system’s response time and temperature regulation. If issues arise, revisit wiring connections and configuration settings. Document any discrepancies for troubleshooting or support requests. Proper testing guarantees a functional and efficient HVAC system.
Heating System Test
Begin by setting the thermostat to “Heat” mode and a temperature several degrees above the current room temperature. Observe if the heating system activates within a reasonable timeframe. Listen for the furnace or boiler to ignite and begin producing heat. Verify warm air is being distributed through the vents.
Monitor the thermostat display to confirm it accurately reflects the system’s operation. Check for any error codes or unusual behavior. Allow the system to run for a complete cycle, ensuring it reaches the set temperature and then shuts off appropriately. Document any issues encountered during this test.
Cooling System Test
Switch the thermostat to “Cool” mode and set the desired temperature significantly below the current room temperature. Confirm the air conditioning system initiates within a few minutes, and the fan begins circulating air. Feel for cool air emanating from the vents, indicating proper cooling operation.
Observe the thermostat display for accurate temperature readings and system status. Listen for the compressor to engage and the fan to operate consistently. Allow a full cooling cycle to complete, verifying the system shuts off when the set temperature is reached. Record any anomalies or error messages.
Troubleshooting Common Issues
If the thermostat displays “No Power,” verify the circuit breaker hasn’t tripped and the wiring is secure. For unresponsive touchscreens, gently clean the surface, avoiding sharp objects. If the system doesn’t respond to temperature changes, double-check wiring connections and system compatibility.
Regarding Wi-Fi connectivity issues, ensure the network is stable and the password is correct. When encountering error codes, consult the Honeywell documentation or website. Remember to disconnect power before inspecting wiring. Contact Honeywell Customer Care for complex problems.
Understanding Relay Outputs and Inputs
Relay outputs on the VisionPro 8000 allow control of external devices like humidifiers or ventilators. Inputs receive signals from external sources, enabling advanced system configurations. However, these functionalities are disabled when using an Equipment Interface Module (EIM).
Carefully review the wiring diagrams to identify specific relay assignments. Proper configuration ensures seamless integration with connected equipment. Incorrect wiring can lead to malfunction or damage. Consult the installation manual for detailed specifications and limitations regarding relay usage. Always disconnect power before making any wiring changes.
Equipment Interface Module Considerations
When utilizing an Equipment Interface Module (EIM) with the VisionPro 8000, certain thermostat features are impacted. Specifically, the thermostat’s internal relay outputs and inputs become non-functional. The EIM assumes control of these functions, providing compatibility with diverse HVAC systems.
Ensure the EIM is correctly configured for your specific equipment. Refer to the EIM’s documentation for detailed wiring instructions and settings. Proper EIM setup is crucial for optimal system performance. Incorrect configuration can lead to operational issues. Always verify compatibility before installation.
Registering Your Thermostat
Registering your Honeywell VisionPro 8000 thermostat unlocks access to valuable benefits, including warranty support and exclusive resources. Visit the Honeywell website or contact Honeywell Customer Care to complete the registration process. Having your thermostat’s model number and installation date readily available will expedite registration.
Registration confirms your ownership and ensures you receive important updates regarding your thermostat. It also streamlines any potential warranty claims. Keep your registration confirmation for your records. This simple step provides peace of mind and enhances your overall experience with your new thermostat.
Warranty Information

Your Honeywell VisionPro 8000 thermostat is covered by a limited warranty against defects in materials and workmanship. The warranty period begins on the date of installation, as evidenced by your proof of purchase. Please retain your receipt for warranty service. This warranty does not cover damage resulting from improper installation, misuse, or neglect.
For specific warranty details, including duration and coverage limitations, refer to the warranty documentation included with your thermostat. Contact Honeywell Customer Care to initiate a warranty claim. Proper registration of your thermostat may be required to validate your warranty.
Contacting Honeywell Customer Care
For assistance with your Honeywell VisionPro 8000 thermostat, or if you encounter any issues during installation or operation, Honeywell Customer Care is readily available. You can reach them through various channels for prompt support. Visit the official Honeywell Home website for frequently asked questions and online resources.
Alternatively, you can contact them directly by phone. The phone number for U.S. customers is readily available on the Honeywell Home website. Ensure you have your thermostat model number and date of purchase handy when contacting support for efficient assistance.
Patent Information (US Patent No. 6595430, D5091)
Honeywell International Inc. holds patents protecting the innovative technology incorporated within the VisionPro 8000 thermostat. Specifically, U.S. Patent No. 6595430 covers certain aspects of the thermostat’s functionality and design. Additionally, Design Patent No. D5091 protects the unique aesthetic appearance of the device.
These patents demonstrate Honeywell’s commitment to research and development in the field of home comfort control. The company actively safeguards its intellectual property to maintain its position as a leader in the industry. This information is provided for informational purposes only and does not grant any licensing rights.